Nagios for VoIP
In this post I will try to provide step-by-step instruction for installing and configuring Nagios on Debian 8 for monitoring any VoIP end-point,
I will use Freeswitch(10.10.10.10:5060) with default config from my previous manual as destination host which we will monitor. All below steps should be executed on Nagios
server by root user, I’m assuming VoIP endpoint is ready.
1) We will need to install LAMP:
apt-get update
apt-get upgrade
apt-get install apache2
apt-get install mysql-server php5-mysql
mysql_secure_installation
apt-get install php5 libapache2-mod-php5 php5-mcrypt
2) Add user Nagios:
useradd nagios
groupadd nagcmd
usermod -a -G nagcmd nagios
3) Install required packages:
apt-get install build-essential libgd2-xpm-dev openssl libssl-dev xinetd apache2-utils unzip git ruby4) Install Nagios Core:
cd /usr/src/
wget https://assets.nagios.com/downloads/nagioscore/releases/nagios-4.1.1.tar.gz
tar xvf nagios-*.tar.gz
cd nagios-*
./configure --with-nagios-group=nagios --with-command-group=nagcmd
make all
make install
make install-commandmode
make install-init
make install-config
/usr/bin/install -c -m 644 sample-config/httpd.conf /etc/apache2/sites-available/nagios.conf
5) Add user web server, www-data, to the nagcmd group
usermod -G nagcmd www-data6) Install Nagios Plugins
cd /usr/src
wget http://nagios-plugins.org/download/nagios-plugins-2.1.1.tar.gz
tar xvf nagios-plugins-*.tar.gz
cd nagios-plugins-*
./configure --with-nagios-user=nagios --with-nagios-group=nagios --with-openssl
make
make install
7) Now find an uncomment this line, by removing #:
#cfg_dir=/usr/local/nagios/etc/servers in /usr/local/nagios/etc/nagios.cfg
8) Now we need to create directory where will store our configuration files of endpoints which we will monitor
mkdir /usr/local/nagios/etc/servers9) Let’s create config file for our Freeswitch, which we will monitor: nano /usr/local/nagios/etc/servers/freeswitch.cfg
define host{
use                             linux-server               ; Inherit default values from a template
host_name                       freeswitch               ; The name we're giving to this server
alias                           awesome freeswitch server          ; A longer name for the server
address                         10.10.10.10          ; IP address of server which we want to monitor
max_check_attempts              5
check_period                    24x7
notification_interval           30
notification_period             24x7
}

define service{
use                     generic-service
host_name               freeswitch
service_description     VoIP
check_command           check_sip
check_interval          5
retry_interval          5
}
10) Now let’s edit file /usr/local/nagios/etc/objects/contacts.cfg and find the email directive, and replace its value with your own email address:
email nagios@localhost ; <<***** CHANGE THIS TO YOUR EMAIL ADDRESS ******11) Enable the Apache rewrite and cgi modules:
a2enmod rewrite
a2enmod cgi
12) Use htpasswd to create an admin user, called “nagiosadmin”, that can access the Nagios web interface, enter password when prompted.
htpasswd -c /usr/local/nagios/etc/htpasswd.users nagiosadmin13) Now create a symbolic link of nagios.conf to the sites-enabled directory:
ln -s /etc/apache2/sites-available/nagios.conf /etc/apache2/sites-enabled/14) This point is optional. Here we will disable monitoring of Nagios server itself, I don’t like such info, cause I just need to know what is happening with my VoIP endpoint, but not with Nagios server, on other hand sometimes it useful to see some additional info regarding your Nagios server, for example when you are running out of space.
To switch off monitoring itself you need to edit /usr/local/nagios/etc/nagios.cfg file and comment out this line: cfg_file=/usr/local/nagios/etc/objects/localhost.cfg
15) On this point we are almost ready with our Nagios set-up, now we need to configure command or agent which will send OPTIONS request to our VoIP end-point. I will use this beautiful software: https://github.com/ibc/nagios-sip-plugin but you can use any other, like sipp or your own.
cd /usr/src
git clone https://github.com/ibc/nagios-sip-plugin.git
cd ./nagios-sip-plugin
cp ./nagios-sip-plugin.rb /usr/local/nagios/libexec/check_sip
16) Now we need to add service description, please edit /usr/local/nagios/etc/objects/commands.cfg and add following under check_ping:
# 'check_sip' command definition
define command{
       command_name    check_sip
       command_line    $USER1$/check_sip -t udp -s $HOSTADDRESS$ -p 5060 # -t (tls|tcp|udp) Protocol to use, -p SERVER_PORT
       }
17) Now let’s restart nagios and apache, additionally we will make sure that nagios will start after reboot.
systemctl daemon-reload
service nagios restart
service apache2 restart
systemctl enable nagios
18) To send notifications you will need mail application, run following commands to install it:
apt-get install mailutils
ln -s /usr/bin/mail /bin/mail
19) This point is optional, if you are using Digitalocean or any other VPS which do not allow to sends e-mails directly from server. We will use gmail account. First lets install ssmtp:
apt-get install ssmtp20) Now you need to edit /etc/ssmtp/ssmtp.conf and uncomment FromLineOverride=YES. At the end of file you will need to add following:
AuthUser=<user>@gmail.com
AuthPass=Your-Gmail-Password
mailhub=smtp.gmail.com:587
UseSTARTTLS=YES
21) Now you need to allow to access to your account for less secure apps: http://www.google.com/settings/security/lesssecureapps
22) This point is optional, you might need to unlock captcha: https://accounts.google.com/b/0/DisplayUnlockCaptcha
23) Now you might try to send e-mail:
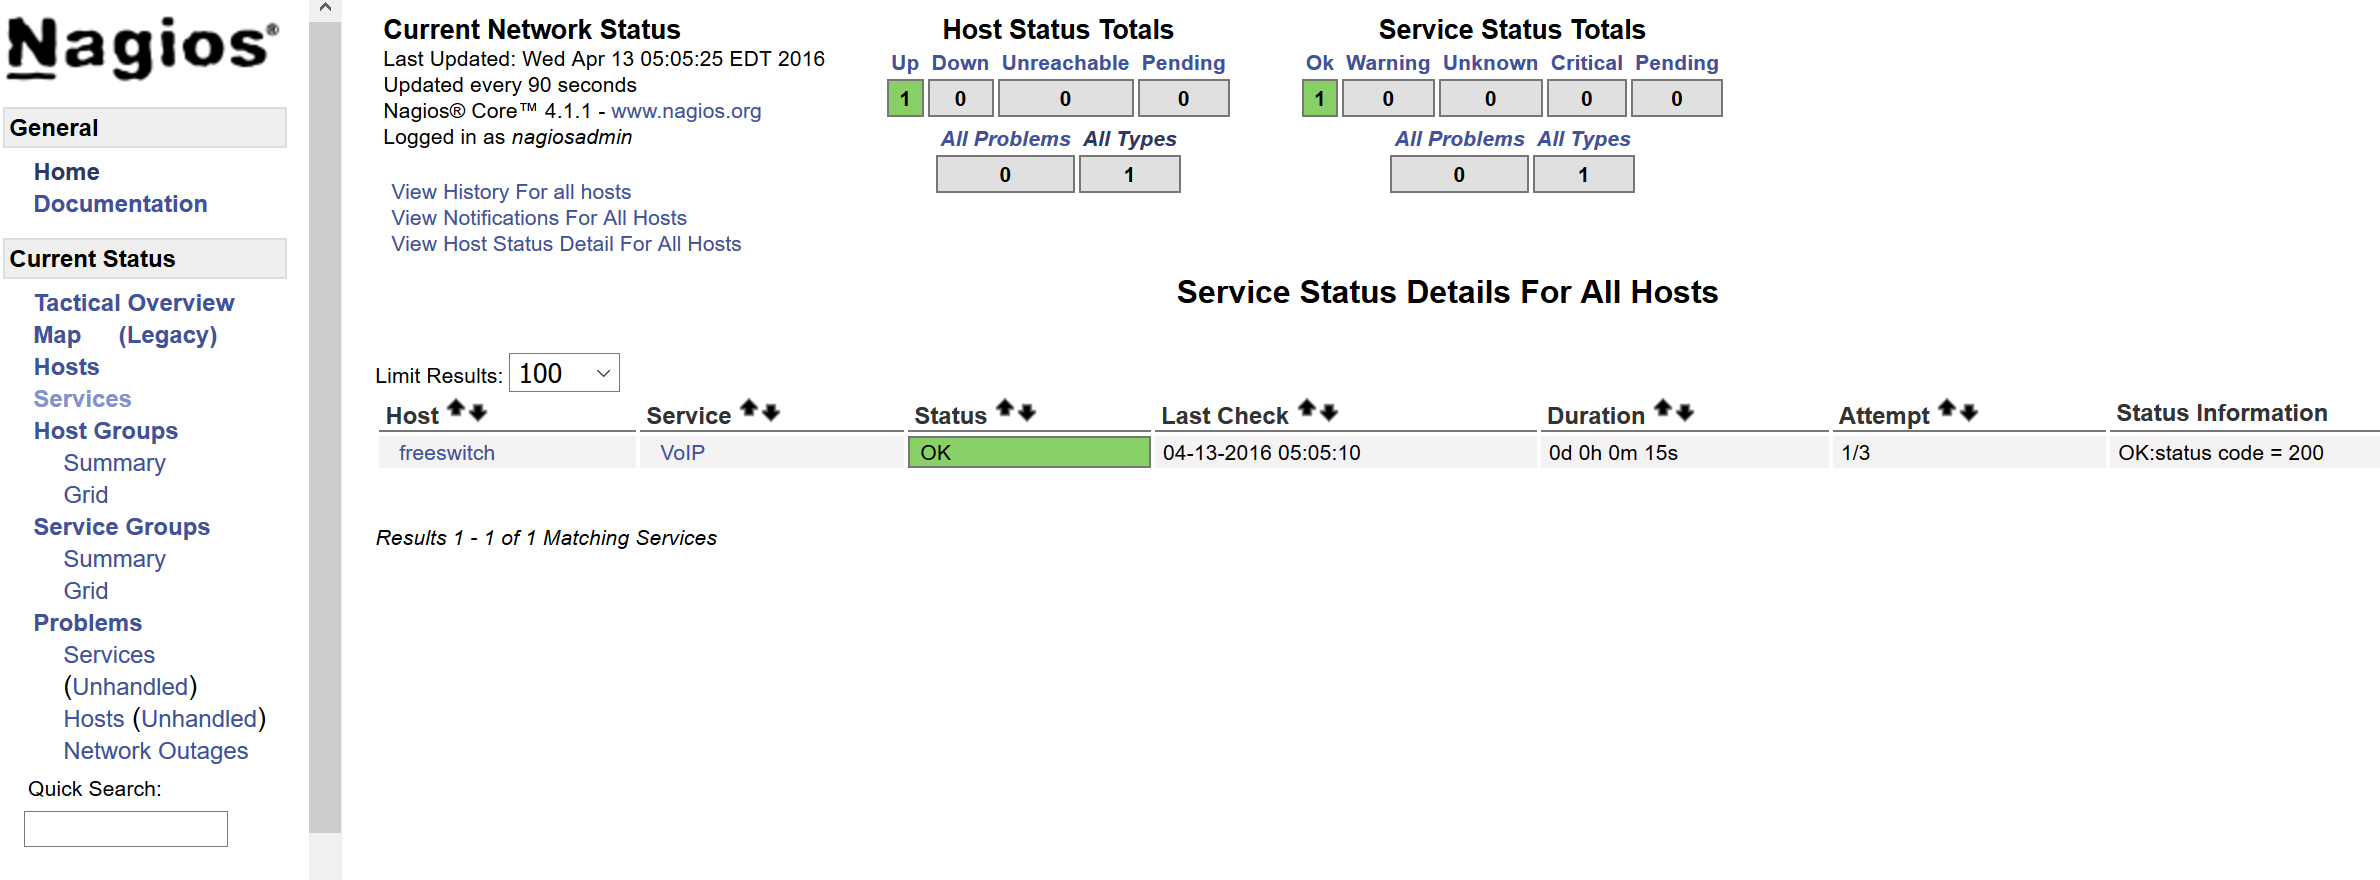
echo "Test test" | mail -s "Test" my@email.com24) If you will receive e-mail this means that your set-up is ready and you can try to login to: http://YOUR_IP/nagios and use nagiosadmin and password which you created at point 12. Go to Services and you will see similar to this page: